Your cart is currently empty!
Category: using up scraps
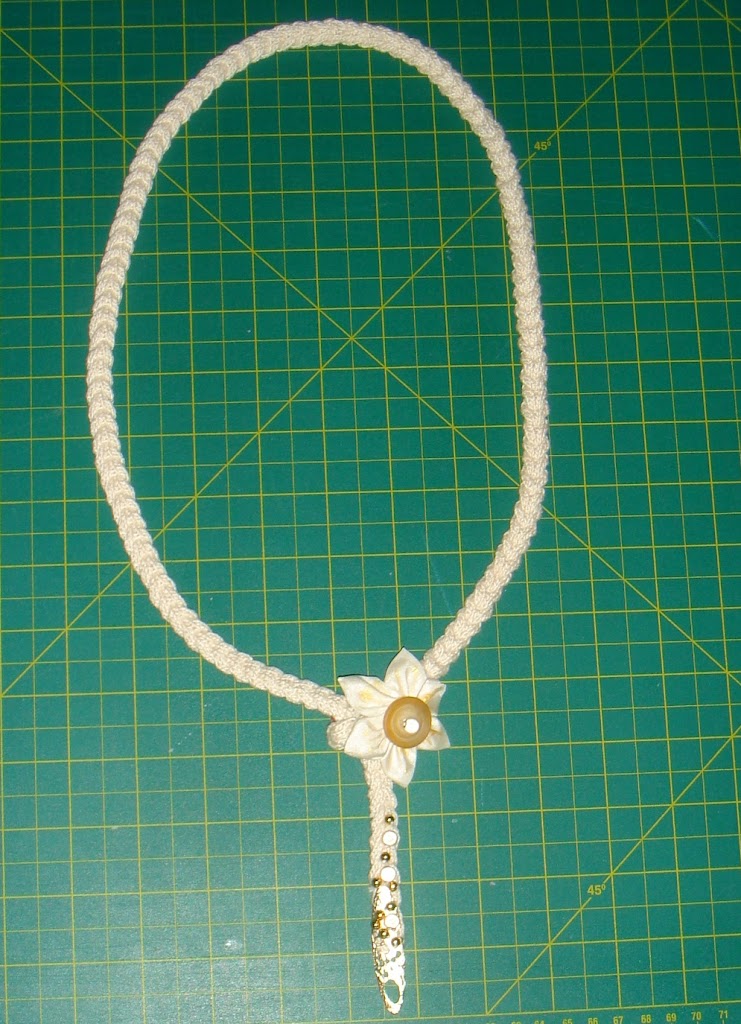
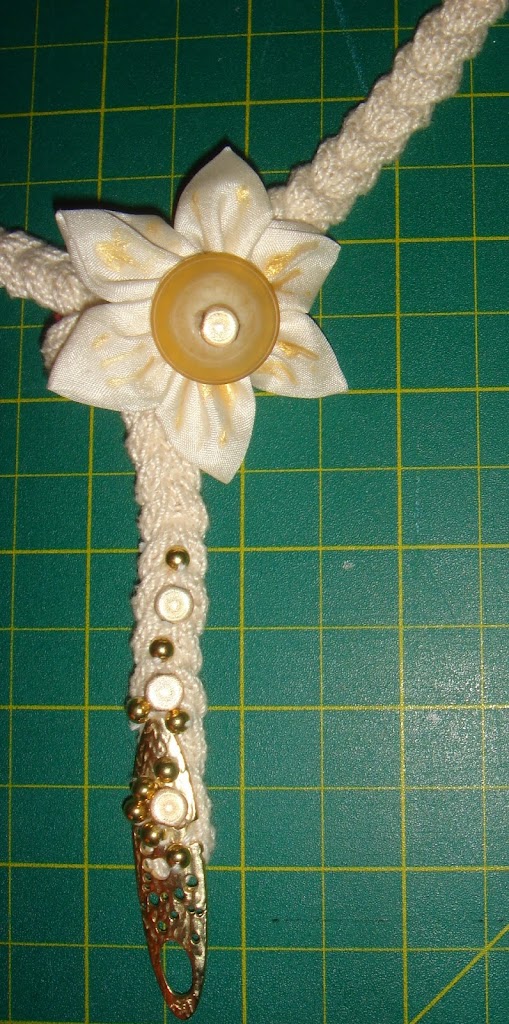
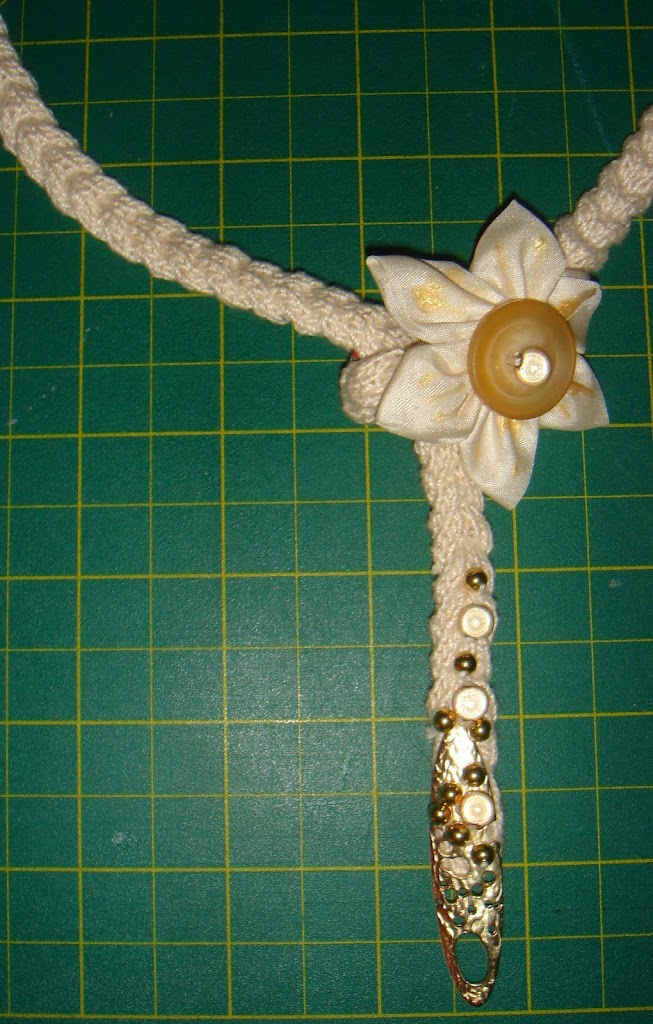
Knitted cotton necklace with Kanzashi flower.
I some vintage crochet cotton left in my stash.
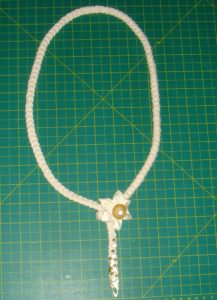
I liked this necklace from olgajazzy. It’s a good beginner project. However I wanted a longer and finer necklace.
So I adapted her pattern a bit. I cast on less stitches and made it much longer.
 I made a Kanzashi flower with some silk. I painted the petals with gold fabric paint.
 I attached some beads at the one end to add some weight.
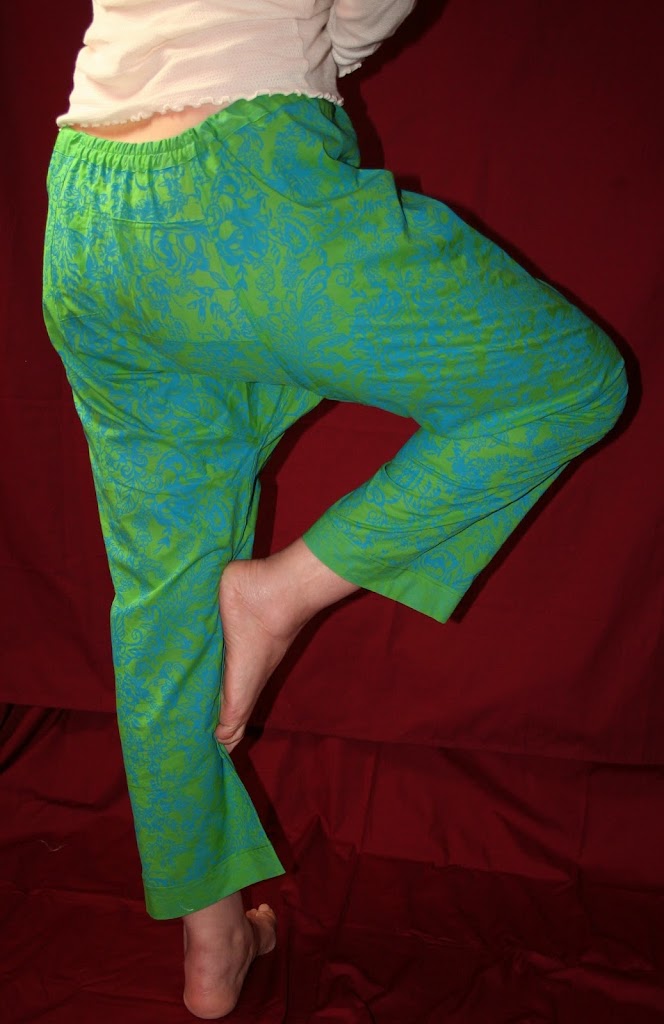
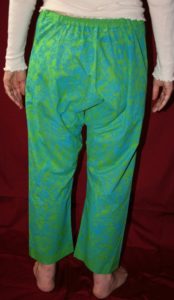
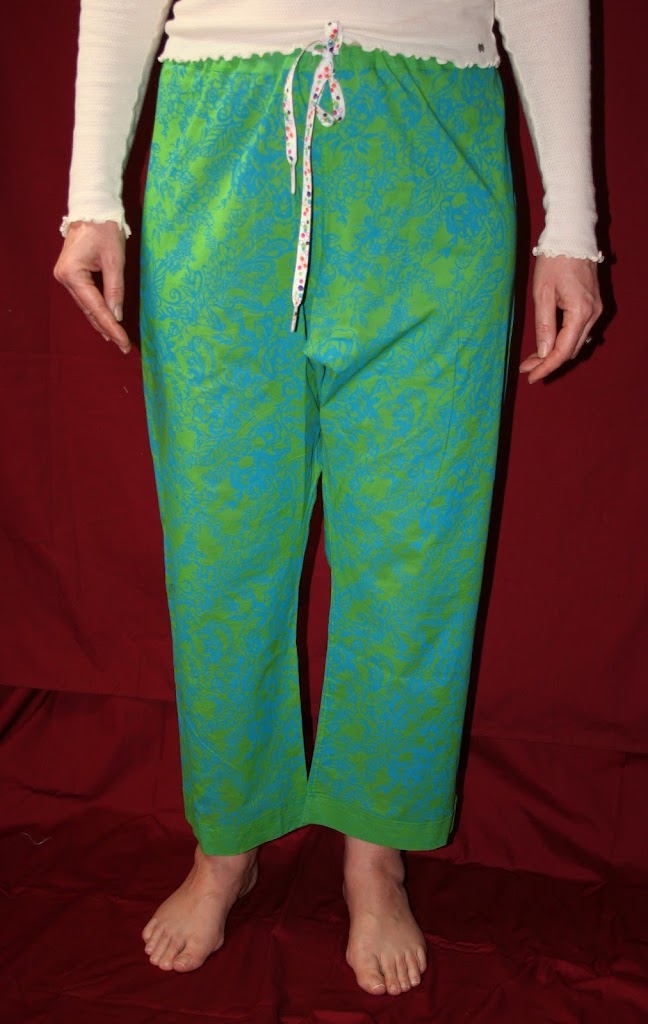
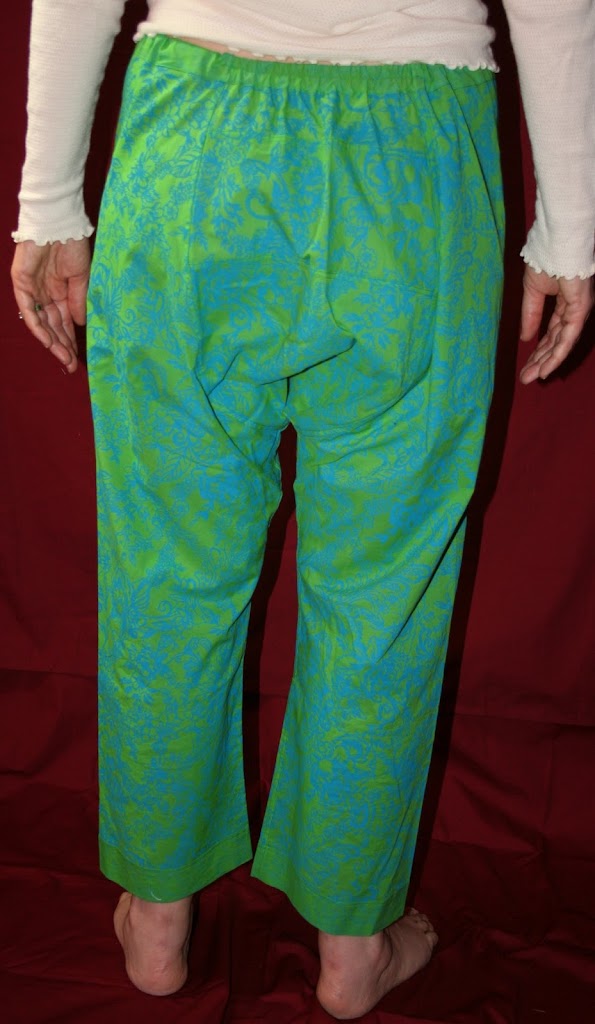
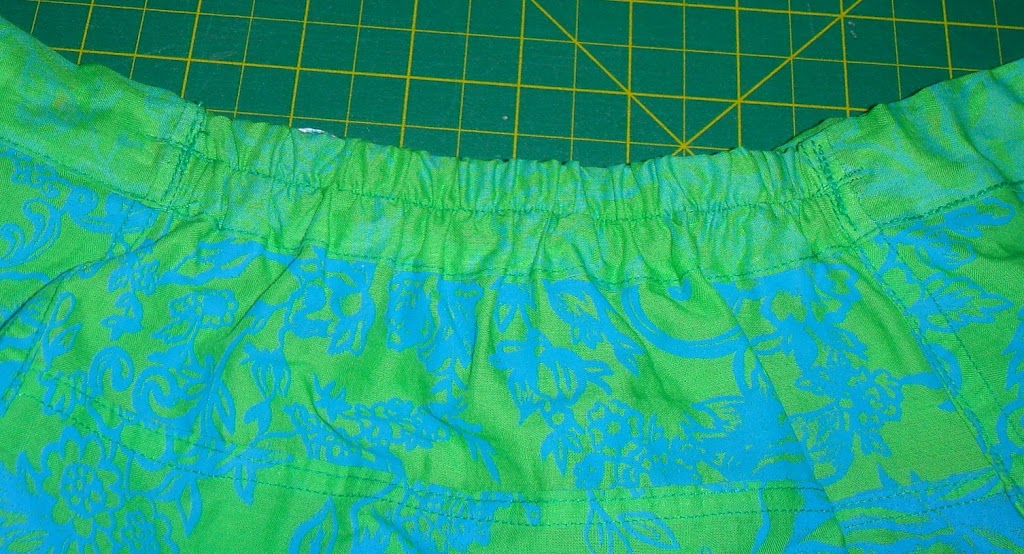
Yoga / Pajama pants
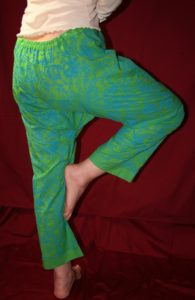

My mother used to sew pants similar to this one for my dad and uncles.
My dad and practically all the men of his generation and older,used
them as underwear and pajamas. They were generally made from plain white
cotton fabric with a drawstring. I remember how all would fold the
bottom a tuck them under their socks. We did not find them appealing
at the time.Recently, I decided to make some using different fabrics. This one is made with fine printed cotton. They are really comfortable and great for lounging.
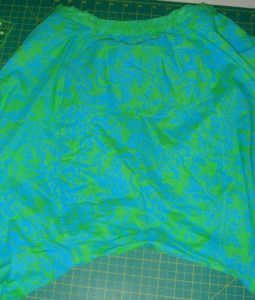
There is an insert in the back for movement and comfort. I did not
have much fabric left for the insert after cutting out the pants so I
joined a few pieces of the scraps I had left until I had enough for the
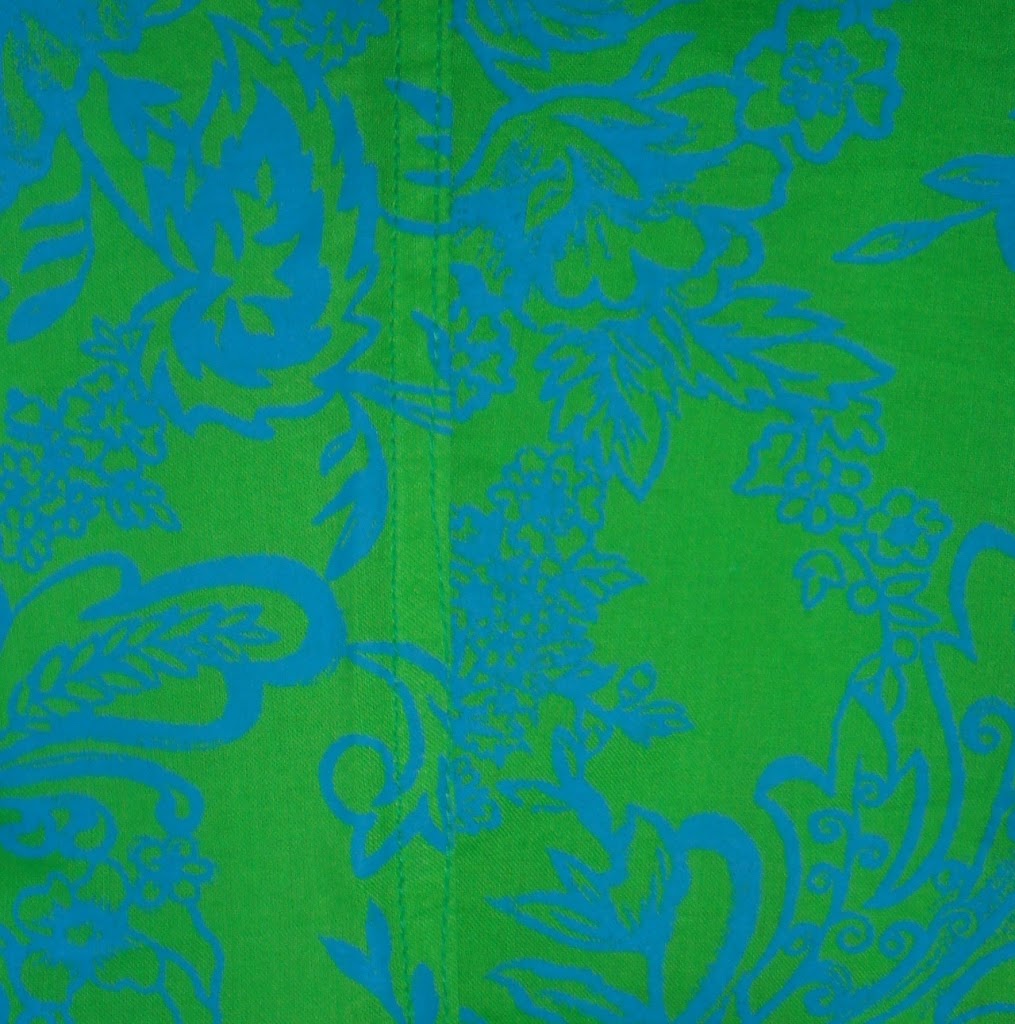
insert. I quite like the added detail. My mother used a french seam. So I used a french seam too but this version has the seam stitched down on the right side imitating a flat felled seam.
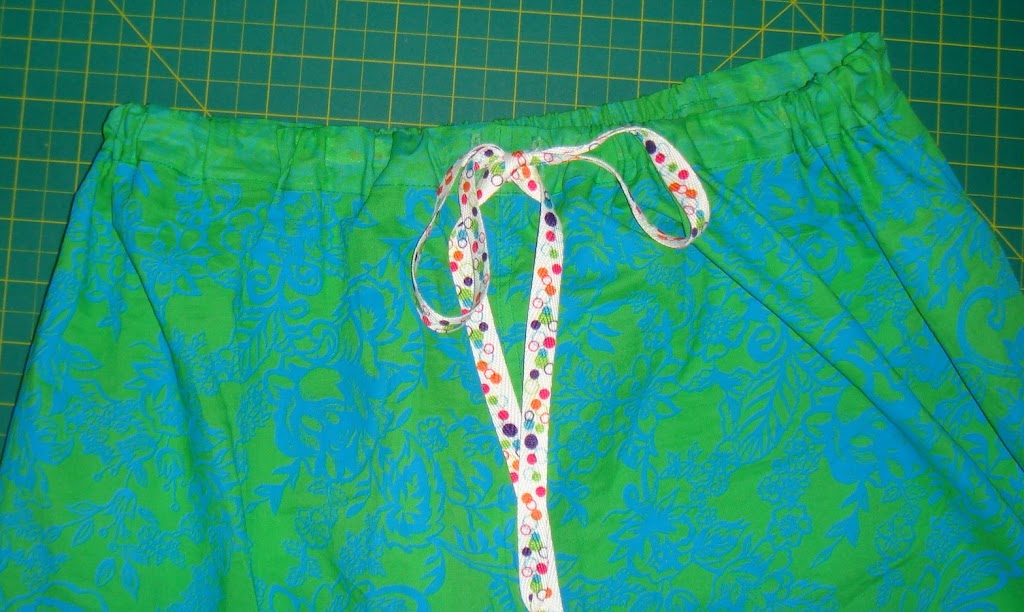
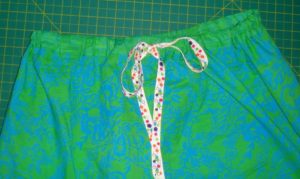 I used shoelaces for the drawstring.
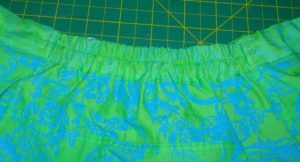 Instead of a drawstring all around the waistband, this one has a partial waistband and a piece of elastic at the back.
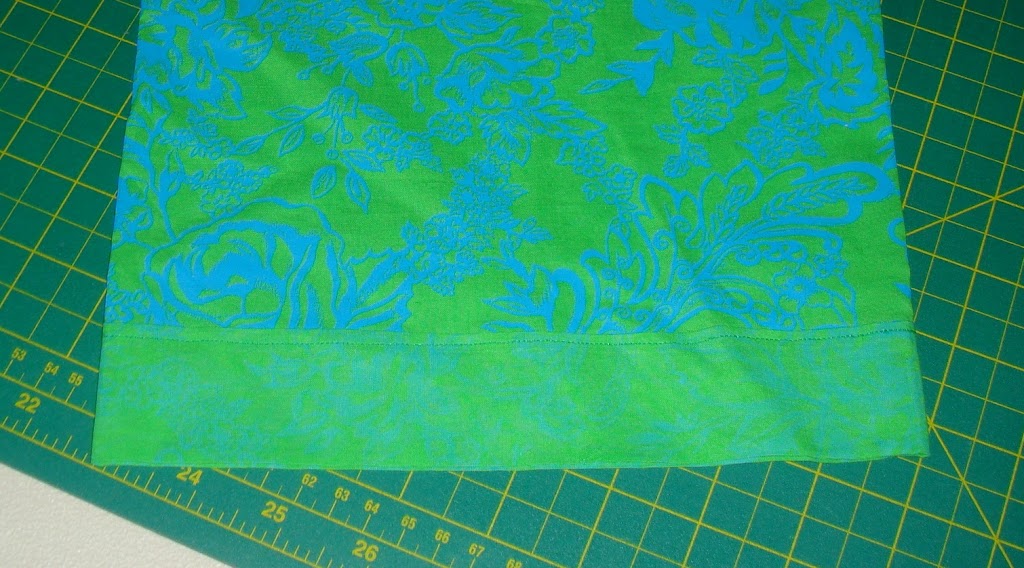
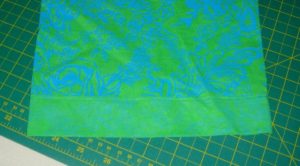 I turned the hem at the bottom and at the waistband outward for the contrast.
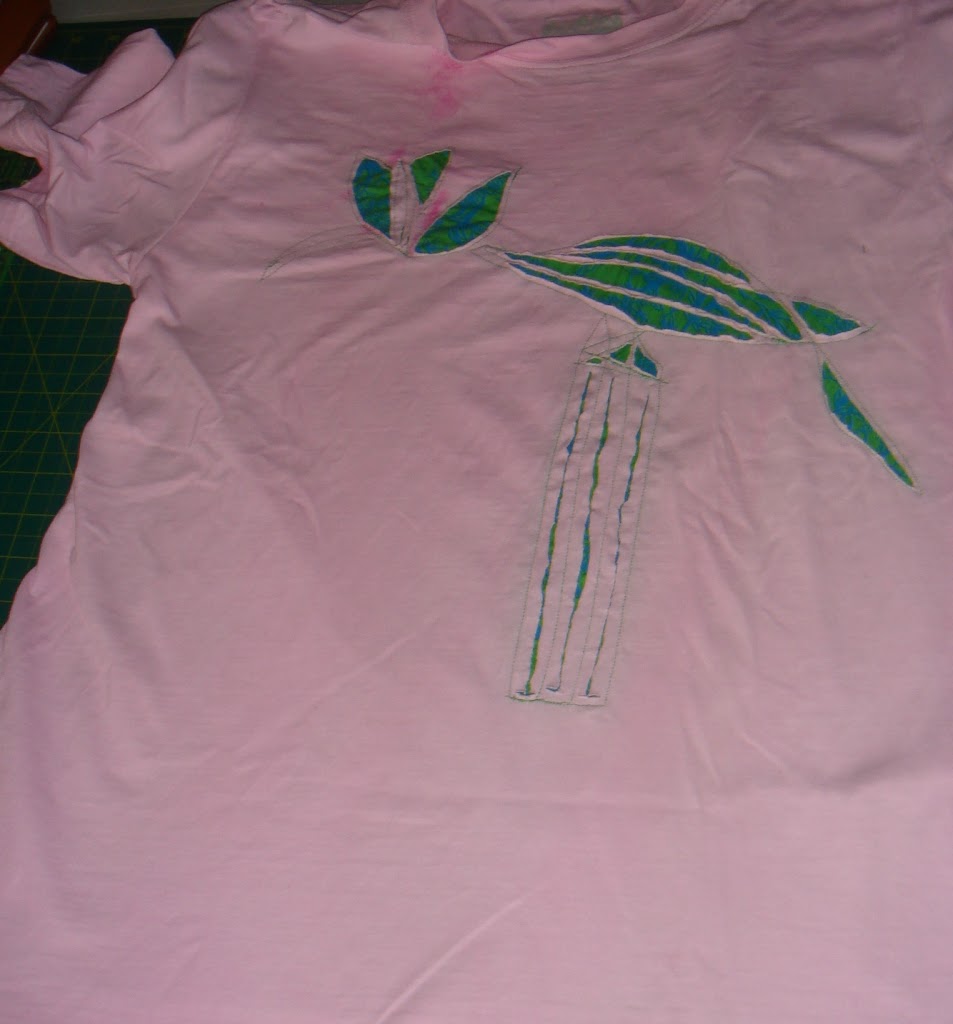
For a top I upcycled one of my husband’s torn white t-shirts.
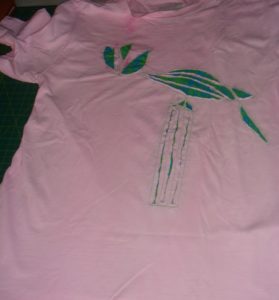 Since it was October and breast cancer awareness month, I decided to dye it pink with the I had left in my stash.Then with the scraps of fabric I had left from the pants, I experimented with some reverse applique.
Stenciled Bibs and Burp cloths

After making some bibs and burp cloths with the scraps that I had left over after completing a quilt, I decided use up more scraps. I was in a real bib making mood.
Even though it was very pretty, I was really getting tired of this pink fabric laying around in all my various scrap storage locations. Originally, my mother had made a gown for herself from the fabric. Years later, I made two night dresses for my sister with what was left over. After that I even still had enough left over to make two smocked dresses. I made those dresses two years ago and I still have some of this stuff left. While I am tired of the fabric I didn’t want to see it go wasted.

Since I was tired of the print itself, I thought I could spruce it up if
I stenciled some images on it. I used some metallic Shiva paint sticks
and a stencil with a gourd pattern on it to make the effect you see in the set above. I have always loved pictures of African gourds and pots.
Aside from the gourds above these are also two of my favorite images from my collection of stencils.
I have now updated these stencils and the templates are available here.Patchwork cushion covers

Our couch seriously needed to be recovered. So after buying the fabric and procrastinating for about four months, I eventually got them done in three days.

I only had a few scraps left after sewing the six boxed pillows.

I did not take a before picture of the old torn boxed pillow covers. But the were made with the same fabric as this cushion which needed a change too.

I remembered that I rescued a book of fabric swatches from the dumpster at the upholstery store down the road last winter. They were put to good use when I made new cushion covers.
I didn’t plan the design. I just joined pieces as I needed them to complete the squares.
Where I was short of fabric, I just added a few pieces of scraps from the boxed pillows and managed to use the piece of fabric I had left from the curtain panels I made last year. It worked to bring it all together.
Tank Bandana Dresses with Kanzashi flowers

After making some tank dresses, I decided to make some flowers with the scraps of fabric that I had left over.
Kanzashi is a Japanese fabric flower making technique.
I recently bought some Kanzashi makers made by Clover. I have always liked the sewing notions made by this company. If I had more space in my sewing room, I think I might own almost everything they make.
Yes you can make these flowers without this tool, but using the Kanzashi maker is much easier. As there is no need to
pre-cut squares or circles of the same size. Which can be difficult or at least tedious. Really, it is much easier with the tool.All you have to do is follow the numbers with the needle and thread, kind of like connect-a-dots. This is great way to use up scraps of
fabric or any odd buttons and beads you may have lying around. Each tool makes a different shaped
petal. I bought both the large and small sizes for each of the shapes. I prefer to make these flowers than yo yo’s.
Another advantage is that I can
sit and make many of them while my husband needs me to be quiet while
he satisfies his Netflix addiction. (Which he claim pales in comparison to my addiction to keeping my sewing stuff in every room in the house and sending him to work with threads on his clothes)
These organza flowers turned out really well. I think it is because the fabric was lightweight but fairly stiff.

After using up the corners of some vintage hankies for this dress, I had to do something with center squares that I had left over. As you can see they also worked out well. I ironed some
lightweight interfacing onto the fabric of one of these flowers (in the center of the flower group). The result was that it produced a
firmer flower.Without the interfacing the flowers are softer.
These flowers were made with scraps that I had left
over after making the bandana dress. I used the pointed petal maker.
I haven’t attached the flowers to the dresses yet because I can’t decide if I want them on the dress or if I should use them as hair accessories.
With this tool you can also make a pointed petal that resembles little slippers. You can also
create a different effect depending on whether you use the front or back of the petal.
As I said above, you can use this tool makes pointed petals and you can use any number of petals to make a flower. By the way, using this tool you can make leaves and butterflies (combining the petals from the large and small size tools.)

You can also make a very pretty flower with the round petal maker.
Ouma Lola Doll
I just had to make
this doll when I saw the pattern on lionbrand.com.So when my friend cleared out her mother’s stash, I had no
reason not to make her. They had a knitted and a crochet version. I chose to do the crochet one and used a old
odd sock to line it before stuffing. This hides the stuffing.She did not turn out quite the way I planned but still looks
cute.The pattern is great for beginners and the instructions are
easy to follow.I had to make a few adjustments though.I ran out of yarn for her dress so I gave her a skirt and a
sleeveless top and then added some of the colour of the top to the sweater.I also extended her pants.I did not have pipe cleaners to make spectacles and when I
tried to embroider them on with some yarn, she looked too much like an
owl. So my version does not have
glasses.I also tried to give her some eyebrows but they did not look
good.I accidently stitched her ears too far from her face but
they were stitched on so securely. So I
didin’t bother to remove them.
I was planning to use these colours for her clothes but the were not soft enough.
 The sweater turned out to big for some reason so I stitched
a button in front to hold it in place. It was a bit frustrating when after three attempts, her legs
were not the same size. It may be the way I stuffed them.But I guess we all have our imperfections, even Ouma Lola.Appliqued Towelling Hoods

One of my students wanted to make some hoods for her grand daughters.
They are really easy to make.
You can embellish them in many different ways or simply use a printed towel. Beach towels with fun prints make great hoods.
The number of hoods you can get per towel depends on the size of the towel and how efficiently you place the pattern.
Fold the towel in half lengthwise.

Place the hood with the front opening in line with the finished edge of the towel.

If you don’t have a hood to work from, use the hood of a hoodie as a guide.

Add a seam allowance.

Sew the seam. Sew on a button and loop. We used a french seam.

We also did the applique before sewing the seam.

For the applique we cut out the ladybugs and flowers from one of Kathy’s scraps of fabric.

We used fusible bonding and ironed the pictures onto the hood before doing the satin stitches.
The top thread was black and white for the bobbin. I tightened the top tension slightly to create the shading.
Three hoods completed.
Recycled T-Shirt. Dust Cover with flowers.
I’ve learnt a lot since I moved to Toronto. Like in winter one needs a humidifier and in the summer, a dehumidifier. When not in use, they become quite dusty.
So I decided to make a dust cover using an old t-shirt.
I dyed the fabric after sewing. I also tried a different dying technique but don’t particularly like the way it took to the dye. It did not turn out too badly though.


I cut the t-shirt at the armhole for the cover and had the rest to make the flowers.

To Make the Flowers:
Cut the fabric into strips. Play around with different lengths and widths of knit fabric.
I had the stitch length at 2 and the stitch width at 1. You can adjust you machine so it sews a small zig zag.
To make the edge curl, you really have to stretch the fabric. It’s fine if it rolls a bit at the edge.
You can also use a rolled hem if you serger.


When you’ve finished the edge, do some medium sized running stitches at the unfinished edge to gather.

 Gather the stitches and start rolling from the beginning. you will need the thread at the end to secure the flower.

When you’ve rolled it up gently pull the gathering stitches and wind the tread around once.Then stitch through all the layers to hold it together.When have made a few you can arrange and embellish them with buttons and beads if you like. You can also place a smaller flower in the centre of the bigger flower.
To make the roses.
There is no need to gather the edge. All you have to do is fold roll it until it forms a rose. It would be better if you lift the next layer ever so slightly as you roll.


Dumpster Dive Find

My friend needed a sewing machine. My husband found this machine in the dumpster one night.
 He accidentally broke the thread spool holder as he took it out of the cart. I glued it together. Even if it doesn’t hold, a free standing thread holder will work well too.
 It came with a sewing machine manual and all the accessories even a dust cover but no foot control. It was easy to find a foot control.
The machine works well but is not as quiet as most new machines. It is easy to operate and even has a built in needle threader which is good but you have to make sure that your needle in the highest position, which is a rule for threading a sewing machine anyway.
 The tension is good. It even worked through thick layers of fabric.The one step buttonhole foot worked well when I tested it but when I tried to make buttonholes on the bag, I just couldn’t get it to do a good job when I tried to sew them on the bag. I made buttonholes using big and small zig zag stitches. I had to stitch on the buttons by hand so I couldn’t test the foot to sew on buttons.
I also did not try doing free motion stitching.After testing all the stitches, I used the scrap of fabric to make a bag for the accessories.
Denim A- line Jumpers


My goal for the next few months is to use as much of the beautiful fabric I have. I used cute fabric to line these jumpers so they can also be reversible. After cutting the the lining, I used the scraps to embellish the denim.

This one is a bit different. I embroidered this scrap of gingham a few years ago after experimenting with dying crochet cotton. I got tired of it showing up each time I attempted to clear out another box. So I decided to make a pocket with it. The last time I went to South Africa, my cousin gave me some crochet cotton. And recently I was given an incomplete bedspread that was started almost eighty years and the cotton to complete it. I only know basic crochet stitches. So I had to find a way to use all this thread. I dyed some of the crochet cotton. It’s a bit tricky to prevent the cotton from getting tangled. One of my favourite presser is this multiple strand foot. Using this foot with a few strands of yarn and basic decorative stitches can create impressive embellishments. I used variegated blue embroidery thread with a three step zig zag for this project.
Another great way to use up scraps of fabric is to make fabric covered buttons.Covered buttons often avoids the frustration of find matching buttons for your project.
I will also teach how to make this lined or reversible jumper.


